Zilnic oferim programe licențiate GRATUITE pe care altfel ar trebui să le cumpărați!
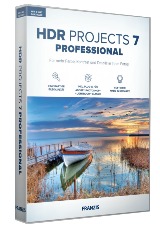
Giveaway of the day — HDR projects 7 Pro (Win&Mac)
HDR projects 7 Pro (Win&Mac) a fost chilipirul zilei în 19 decembrie 2023
Fotografii spectaculoase în cel mai scurt timp - asta reprezintă seria de proiecte HDR. În doar câțiva pași, puteți crea imagini perfect expuse, cu un contrast și detalii neimaginate. Pe lângă instrumentele de calitate dovedită, cea de-a șaptea ediție oferă funcții noi pentru rezultate impresionante. NOU: Highlight Boost pentru desen optim în evidențieri și mai multă profunzime a imaginii Imagini cu contrast ridicat, cu cele mai fine detalii Cele mai bune rezultate: fără zgomot, fără tonuri de culoare Flexibil: poate fi folosit ca autonom sau plug-in Performanță accelerată pentru lucru fluid
The current text is the result of machine translation. You can help us improve it.
Cerinţe minime de sistem:
Windows 7/ 8/ 8.1/ 10/ 11; Hard Drive Space: 2 GB; Graphic card: DirectX 9 compatible, 128 MB, 32 bit color depth; Screen resolution: 1.280 x 1.024 Pixel; Mac OS X 10.7 or higher, 64-bit, Intel processor, 8 GB RAM, 1,920 x 1,080 pixel resolution, 2,304 x 1,440 pixels for Retina
Publicist:
FRANZIS Verlag GmbHPagina de pornire:
https://www.projects-software.com/deal/hdr-projects-7Dimensiunile fişierului:
547 MB
Licence details:
Lifetime
Preţ:
$99.00
Comentarii la HDR projects 7 Pro (Win&Mac)
Please add a comment explaining the reason behind your vote.
In a probably unsurprising development here's yet another screed on using a Franzis product... I don't work for them and haven't had any contact with them for a long time, but I think some of their products are good but have something of a learning curve, so try to help... This one is only lightly edited from the previous Giveaway of this product, it could do with some repetition removing, but hopefully people will understand I have to go buy Christmas pressies...
"High Dynamic Range" is referring to enabling you to see more of the brightness range in the original scene. Cameras can only capture 12-14 stops (factors of 2) of brightness (outside that range you get white at the bright end and black at the dark). What the camera's exposure system allows is for you (or it) to choose what brightness level that range is arranged about.
You can have 20 stops of brightness in a scene, so whatever exposure you choose a lot of the detail won't appear (you should get everything on a dull day with 8 stops of brightness in the scene though). However by taking 3 (say) 14 stop images each separated by 3 stops you get information for 20 stops of brightness (so for the Sunny Window in the dark room you have a shot showing what is outside, but that shot won't show what's inside, it will be mostly black; but you have another shot with the interior detail and the window is white). The HDR software then chooses to use the bright detail from the first image and the dark detail from another. It must map that range onto the 8 or 10 bits of brightness your monitor supports (or whatever your printer allows, etc.), but you still see a lot more Dynamic Range from the original scene. One issue is making it look natural - although some people like more unnatural looks, that's for the photographer and audience to debate (personally I'm not a fan of overblown HDR effects except in rare subjects).
To clarify shooting at +/- two stops means with a shutter speed 4x and 1/4x the correct exposure. Don't adjust the aperture as that will change what is in focus. Some cameras built-in bracketing feature can change the ISO rather than the shutter speed to avoid a too-low shutter speed for one of the shots, which is okay if it's low, but high ISOs will cause issues due to the increased noise. For three stops it's 8x and 1/8th.
So for example three images at +/- 3 stops could be 1/60th, 1/500th, 1/4000th
or five images at +/- 2 stops: 1/30th, 1/125th, 1/500th, 1/2000, 1/8000
(where the centre of the group is the correct exposure).
Often three images at +/- 2 stops is fine, depends how much detail is very bright or very dark in the image.
It's best to use a Tripod (or random bit of scenery to rest the camera on - a bean-bag can be great) to shoot the bracketed images, but if they are shot close together (many cameras have bracketing options that will shoot the images in a short burst, or even have in-camera HDR options where you can choose to keep the original images), ideally with stabilisation in-lens, in-body or both, then you can still get good results. Most HDRs I've done were shot hand-held.
I really like the Franzis Projects tools and some are quite excellent (their B+W converter is the best I know and Sharpen Projects is again excellent once you get away from its default attempt), so I always try to see if I can help people get over the initial learning curve. (Registering if you haven't done it for a Franzis tool before is also an adventure, but the tools are good IMHO.) I do like their HDR tool and think it is well worth installing. Another free option used to be HDR Efex 2 which is part of the Nik Tools which were Google and are now DXO, and were available as a free download when they were Google, so might still be around. Note the Nik tool is a Plugin but you can just (on Windows) drag a link to the HDR Efex 2 .exe to the desktop and go from there (although IIRC it just saves the result in a "standard" location rather than offering a choice). If you have Lightroom that also has built-in HDR support. I personally think Aurora (paid, although older versions are sometimes given away with magazine subscriptions and such like) is the best HDR tool, but you can get some really good results in HDR Projects.
Note that HDR Projects has a lot of options and you may need to play around a bit to get a natural looking HDR, unless you fancy doing something with a more unnatural look (although some people are not fans of highly processed HDRs others like the effect).
Oh and while I am doing a bit of a quick start guide don't forget to check out the manual, especially the stuff on Ghosting removal.
As I said it's a bit of a pain to register (unless you've done one of their tools before) but persevere and you'll get there.
You can either combine multiple images into an HDR or just select a Raw file (if you have one) and work from that (it won't be as good, but a fair bit better than the JPEG).
With the HDR software in today's give-away you have an additional step beyond just opening a photograph, you have to select the images to combine and choose some options. I was very pleased to see it has support for Raw file import, although for a long time Franzis haven't supported many recent cameras. (but see at the bottom for a partial solution to this).
Once you’ve imported the images it works in basically the same way as the other Franzis Projects software.
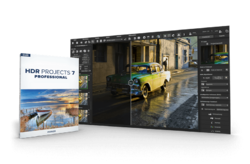
The thing to get your brain around with the Projects software is they are a huge pile of image processing tools, which are gathered together into presets in the left pane. All those options do is select a bunch of processing tools and choose options for them, so they are infinitely tweakable. HDR Projects adds a multiple image merging option on top.
After you've loaded the image(s) you want to work with you can then play with the canned effects on the left side, play with assorted things on the right side panel (which should start on the “Finalise” tab). I'd go with the defaults in the "HDR Preparation" dialogue initially.
Once you are happy with that changing to "Expert" in the right panel (entirely optional and can be ignored) means you can add filters from the list at the top, select them in the middle of the panel and tweak their effects at the bottom (may need scrolling down). (The options on the left are just choosing and configuring a bunch of these options for you.) I'd be inclined to ignore this for quite some time and you never have to use it.
The boxes at the top of the left panel filter the effects that are listed in the panel, so ignore them initially. Later you can use the favourites option to make a short list of presets you prefer (generally or just for the current image).
When saving the final image note that the first dialog, where it asks for the title, is going to write that over the image, it isn't the file name. The main disadvantage is the lack of Undo operations, although you can save Restore points.
I literally spent 90 seconds working on an image and was really quite pleased with the result. If you don't mind the learning curve and fancy playing with HDR I'd recommend it.
Oh, and as advertised above - to add raw support for more recent (although not very recent) cameras:
Usually the GAotD releases come with an old Raw file import library (e.g. from 2014) so straight-out-of-the-box won't support more recent cameras. However you can just copy a later version of FreeImage.dll over the one in the program's directory to help with that (although it's still not completely up-to-date).
Look in "C:\Program Files\Franzis\HDR projects 7 professional" and see if it has an old version of FreeImage.dll, which is the library that decodes Raw images from your camera (you don't care if you only plan to use it with JPEGs). I replaced this with the newest version I have (once I've shut the program down so don't have a sharing error) which is:
FreeImage.dll - 6,924,800 bytes - 26-02-19
Alas usually you can download later versions from Franzis, but the downloads haven't been updated so you have to go to:
https://freeimage.sourceforge.io/download.html
and download the DLL (second link down the page)
Unzip the archive and choose the correct copy (x32/x64 - if you're running the 32-bit version of Windows your computer won't have a directory "C:\Program Files (x86)") of FreeImage.dll from FreeImage\Dist (which is 3.18.0.0, same as the one I used). I did install and test this exact file and it does work with supported cameras. You don't need the archive afterwards.
Note these are still not completely up-to-date, so recent cameras may not have Raw support and you have to use the JPG or make a 16-bit TIF file in your favourite Raw processing software (or just try 3-5 bracketed JPGs).
If you have a Mac you'll need to get the OSX version of FreeImage from SourceForge and replace the existing one, wherever it might be.
Good luck and enjoy!
P.S. If it doesn't look good on your high-DPI display (i.e. 4k/5k monitor) I'd recommend, on Windows 10 or 11, that you right mouse button the program, select Properties, then the Compatibility tab, click "Change high DPI settings", tick "Override high DPI scaling..." at the bottom of the next dialogue and select "System (Enhanced)", or if that doesn't work well then "System".
P.P.S. one other thing, sometimes they screw up and send English users an e-mail in German rather than English, just be laid back about it... it's part of their charm (err...)
P.P.P.S. I should also say never pay full price for their software but if you want something subscribe to their newsletter and wait for the (usually) inevitable deal.
Save | Cancel
P.P.P.P.S. Last given away on 23rd March, see here for comments then:
https://www.giveawayoftheday.com/hdr-projects-7-pro/
It looks like they have updated the version of FreeImage.dll in the installer, so that part of my comment can probably be ignored.
Oh and I missed my train last time and I'm going to miss it this time too... for those that asked...
Save | Cancel